Aren’t these adorable?
They are very easy to make.
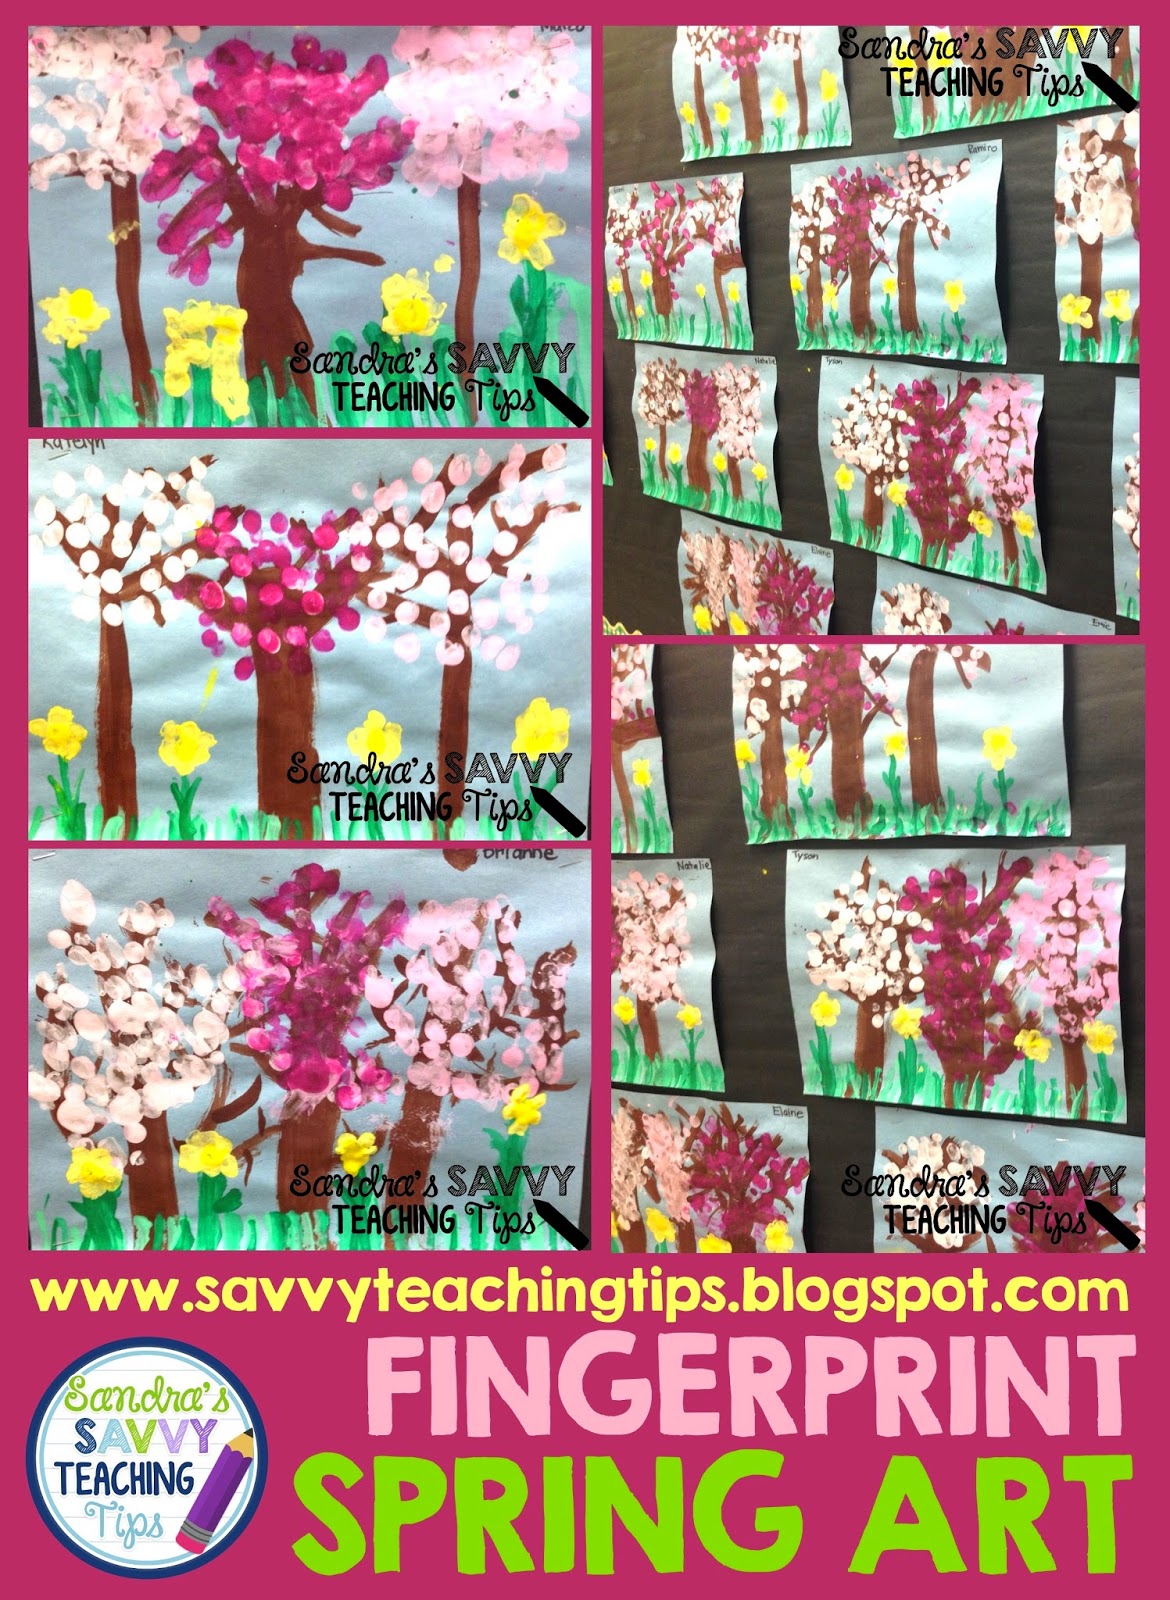
You will need blue background paper and liquid tempera paint in the colors above.
Step 1
Demonstrate how to dip a finger in brown paint and drag their finger down the page to make three tree trunks. Try to make the middle one a bit thicker. Add skinny branches. Let dry
Step 2
Once the brown paint is dry. Have the children paint the grass and the flower stalks. Use the dragging the finger technique from step one. I showed them how to lighten the green by dipping their finger in white paint and then green paint. That’s how the various shades of green were achieved in the grass above. Let dry.
Step 3
Add the blossoms to the trees. This time the children will dab in the paint and then dab the pain on the paper in a stamping motion (not a swiping motion like above). I showed the kids how to make the lighter colored blossoms first. They dipped their finger in the white paint first and then the pink to get variations on the color pink. When they finished the light pink, I put it aside and they came back up and did the blossoms in the dark pink.
Step 4
You don’t have to wait for the blossoms to dry to add the yellow flowers, but you can if you’d like. Using their fingers again, the children make the flowers with a stamping motion again.
That’s it! Voila! Easy Fingerprinting Spring Art
Thanks for popping by today!

These are beautiful! I always look for creative art lessons for my 3rd graders.
Classroom in Paradise
These are beautiful! I always look for creative art lessons for my 3rd graders.
Classroom in Paradise